Welcome back, to “The Root Word” readers! Today, we’re diving into the world of hair styling to uncover the secrets behind creating a bouncy blowout. Whether you’re getting ready for a special occasion or simply want to add some extra oomph to your everyday look, a bouncy blowout is the perfect way to achieve effortless glamour. So, grab your hairbrush (we love a great round brush from Ergo) and let’s get started!
Step 1: Prepare Your Hair:
Before diving into the blowout process, it’s essential to prepare your hair properly. Start by washing your hair with a volumizing shampoo and conditioner to add extra body and lift. A team favorite here at the salon is the duo from Alfaparf Milano. Once your hair is clean, gently towel dry it, removing excess moisture without roughing up the hair cuticles. A microfiber towel is great for this!
Step 2: Apply Heat Protectant:
To protect your hair from heat damage, apply a heat-protectant spray or serum evenly throughout your damp hair. For this, the All In One Leave-In Fluid from Alfaparf Milano can’t be beat. This step is crucial in maintaining the health and integrity of your locks while achieving that bouncy blowout.
Step 3: Divide and Conquer:
Next, divide your hair into sections. Start by creating a parting down the middle, and then divide each side into two sections, securing them with clips. This division will make it easier to blow dry your hair evenly and achieve that bouncy volume.
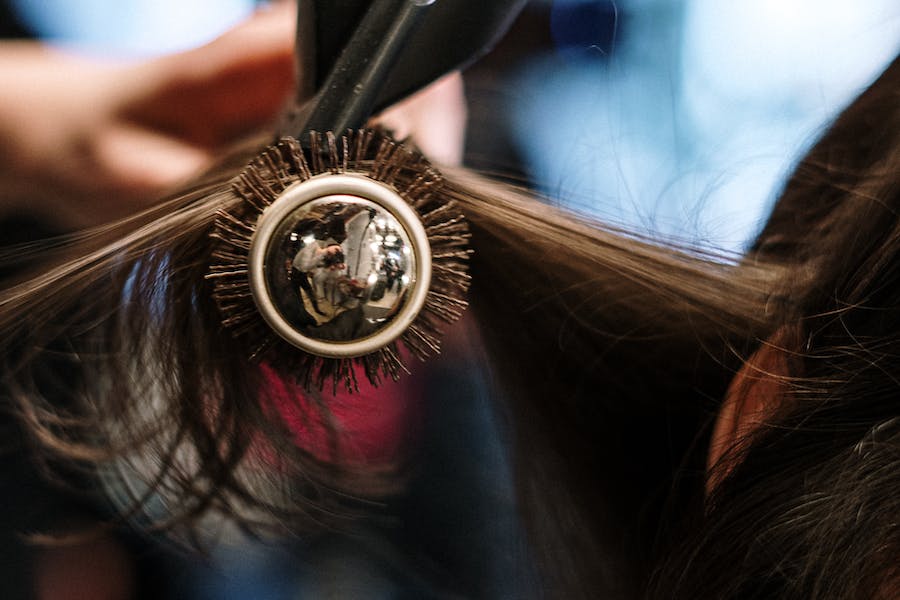
Step 4: Blow Dry Technique:
Now, it’s time to bring out the blow dryer! Using that round brush we talked about, start with the bottom section of your hair. Take a small section and wrap it around the brush, directing the airflow from the roots to the ends. As you move the brush down the hair shaft, gently roll it away from your face to create a soft, bouncy curl. Repeat this technique for each section, working your way up towards the crown of your head.
Step 5: Cool and Set:
Once you’ve finished blow-drying each section, it’s essential to set the curls in place. To do this, switch your blow dryer to the cool setting and blast each section with cool air for a few seconds. This step helps to lock in the shape and add longevity to your bouncy blowout.
Step 6: Finishing Touches:
To complete your bouncy blowout, add some finishing touches. Use a wide-toothed comb or your fingers to gently separate the curls and create that effortless, tousled look. For added volume and hold, you can also spritz a lightweight hairspray or texturizing spray throughout your hair. Alfaparf comes to the rescue again here with their Soft Spray Hair Wax.
Conclusion:
Congratulations, you’ve mastered the art of creating a bouncy blowout! With these simple steps, you can achieve glamorous, voluminous hair that turns heads wherever you go. Remember, practice makes perfect, so don’t be discouraged if your first attempt doesn’t turn out exactly as planned. Keep experimenting, and soon you’ll be a pro at creating the perfect bouncy blowout. Now go out there and rock that gorgeous hair with confidence! Additionally, your favorite team member at our salon also offers styling lessons and advice on the perfect products for your hair type.