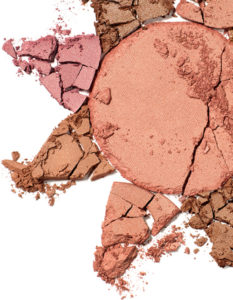
It’s that time of the year when we all want that “healthy glow” that complements our fabulous springtime hair and wardrobe, but refuse to sit out under those harmful UV rays in the heat of Arizona!
So we look to products like Uruku Bronzer by Aveda (sold at The Root, of course!) to give us the look of a bronzed goddess, without those dangerous side effects. However, I’ve heard many clients over the years complain that they feel bronzer-challenged and end up frustrated trying to apply it at home. So, I’ve decided to share three tips for bronzer success that I learned once at a pro-artistry workshop in San Francisco; three fool-proof tips that will work on any and all skin tones and types.
So let’s go-Ready, Set, BRONZE!
#1- Choose the Right Shade
Your bronzer should be no more than two shades darker than your natural skin tone. Bronzers that are too dark tend to give less of a ‘sun kissed’ look and more of a ‘just rolled around in the dirt’ look. Bronzers that are too light will end up looking muddy or ashy on the skin. Before purchasing, hold up the bronzer to your face and look in the mirror, or better yet, have your stylist apply the bronzer on your skin next time you’re in and try it on!
#2- Select the Appropriate Brush
Brushes designated as “bronzer” brushes tend to be very large and dense, picking up a ton of product-which is great for someone who is looking to enhance an existing tan. But for those with a fair complexion, the thick, full brushes often deposit way too much color, and then we spend valuable time trying to undo the streaky mess we’ve made. For a more subtle, natural look, start with either a fan brush or a soft crease brush to apply bronzer- yep, I said crease eyeshadow brush! A crease or “blending” eyeshadow brush works great when you want just a slight hint of color along your cheekbones. By applying this way, we can layer the color, customizing it to your complexion.
#3- Apply Strategically
Most of us hear the word “contour” and shy away. Contouring sounds like it takes a lot of skill and work, and none of us have time for that before heading out the door each day!.But if you remember this tip, it is fast and easy. Bronzer should always be applied wherever the sun naturally hits your face. A quick and easy way to do this- follow the shape of the number 3 on the side of your face- Start at the top of your forehead- sweep in along the cheekbones and back down along your jawline to your chin. Give it a try. If you can draw the number 3, you can apply bronzer like a pro!
Blog by Melody
[/fusion_builder_column][fusion_builder_column type=”1_1″ background_position=”left top” background_color=”” border_size=”” border_color=”” border_style=”solid” spacing=”yes” background_image=”” background_repeat=”no-repeat” padding=”” margin_top=”0px” margin_bottom=”0px” class=”” id=”” animation_type=”” animation_speed=”0.3″ animation_direction=”left” hide_on_mobile=”no” center_content=”no” min_height=”none”][ssboost][/fusion_builder_column][/fusion_builder_row][/fusion_builder_container]
